From my experience while using Windows, I have come across two types of virus infections. One is where the virus infects an individual file or a number of files. The other is where the virus infects the drive or ‘writable’ storage medium itself.
The latter form of infection can cause a number of severe damages. I have experienced one case where the virus infected the medium, proceeded to rename all the folders on that medium, including the Windows system folder. It was later that I discovered that those renamed folders have actually become .exe files.
There was another case where the virus infected the medium and replaced the files and folders on it with shortcuts of the same names (as the files and folders themselves).
This HOW-TO will explain how to clean the latter form of infection using the Ubuntu Live CD/DVD.
Step 1:
First you will need to obtain a Ubuntu Live CD/DVD; preferably the latest version. It can be downloaded from Ubuntu.com but you will get it as an ISO image file and you will have to burn it to either a blank CD or DVD, depending on the type of ISO you have downloaded.
Step 2:
Check in your PC/Laptop's BIOS setup to make sure that your CD/DVD-ROM/RW drive is set as the first boot device.
Step 3:
Put your Ubuntu Live CD/DVD in your CD-ROM/DVD-ROM drive and restart your PC/Laptop. (Assuming it would have to be powered on already in order to get the disc into the drive.)
Step 4:
If you did not get any error messages during the boot process, you should soon be at the Gnome Desktop. Insert your removable storage medium into the appropriate slot/port on your PC/Laptop.
NOTE:
This HOW-TO works for external hard drives, floppy disks, SD cards, flash drives, USB thumb drives and other storage media, but I did my experiment using the USB thumb drive.
Also make note that the medium 'should' also be formatted using the FAT32 file system. You will discover that, you may have the option of formatting it using the NTFS file system but, this is absolutely discouraged being that, NTFS is best suited for installing Windows and it requires a percentage of your drive space as overhead. You will also discover that, your medium might have come preformatted with the FAT file system. I usually reformat mine using the FAT32 file system because, it has advance features and handles file storage better (than FAT).
Step 5:
Your drive should be auto-mounted and appear on your desktop as the label you set when your formatted it. Notice from Fig. 1 below that mine was labeled as 'TRANSPORTER'.
Double-click on the icon to open it.
Step 6:
When the virus infected my drive (on Windows), it created a hidden folder. Now you have discovered, from Fig. 1, that the name of it is
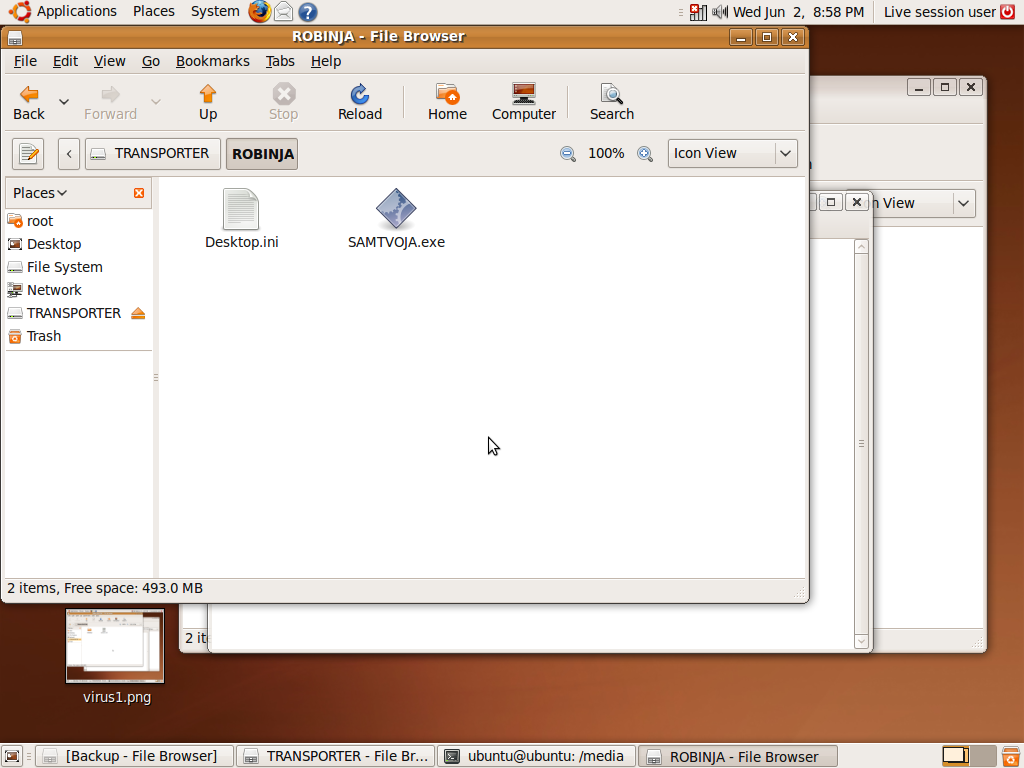
ROBINJA. I double-clicked on the folder to open it, Fig. 2, and I got a .exe file: SAMTVOJA.exe
Make note that I opened the folder just for exploration/explanation sake, because it is the folder itself that we are going to get rid of in order to rid the medium of the virus.
Fig. 1 (Click on each image to view its full size.)
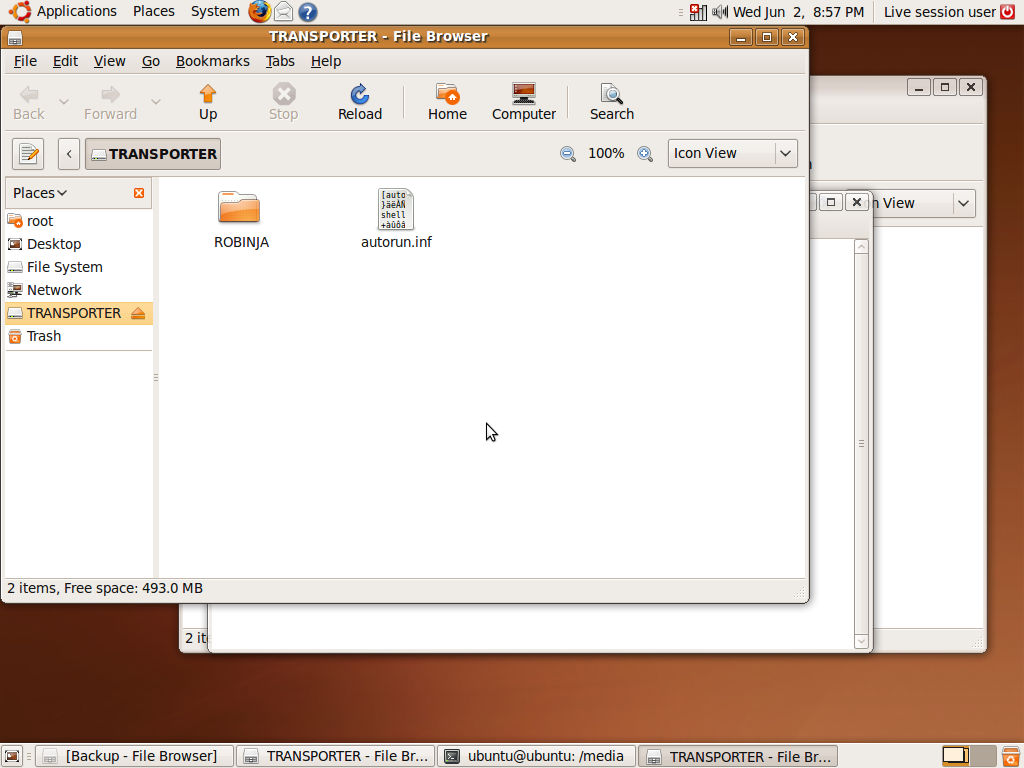
Fig. 2
Step 7:
With the folder highlighted, Fig. 3, press delete on your keyboard and confirm the delete. Notice that I also chose to delete the
autorun.inf file. This is merely by choice, being that it wasn’t a virus, per se, but, there are many cases where viruses, torjans and other types of malware will exploit such a file upon their initial infection stage.
There are other ways to delete a file in Linux but this method should move the folder to 'Trash'.
Fig. 3
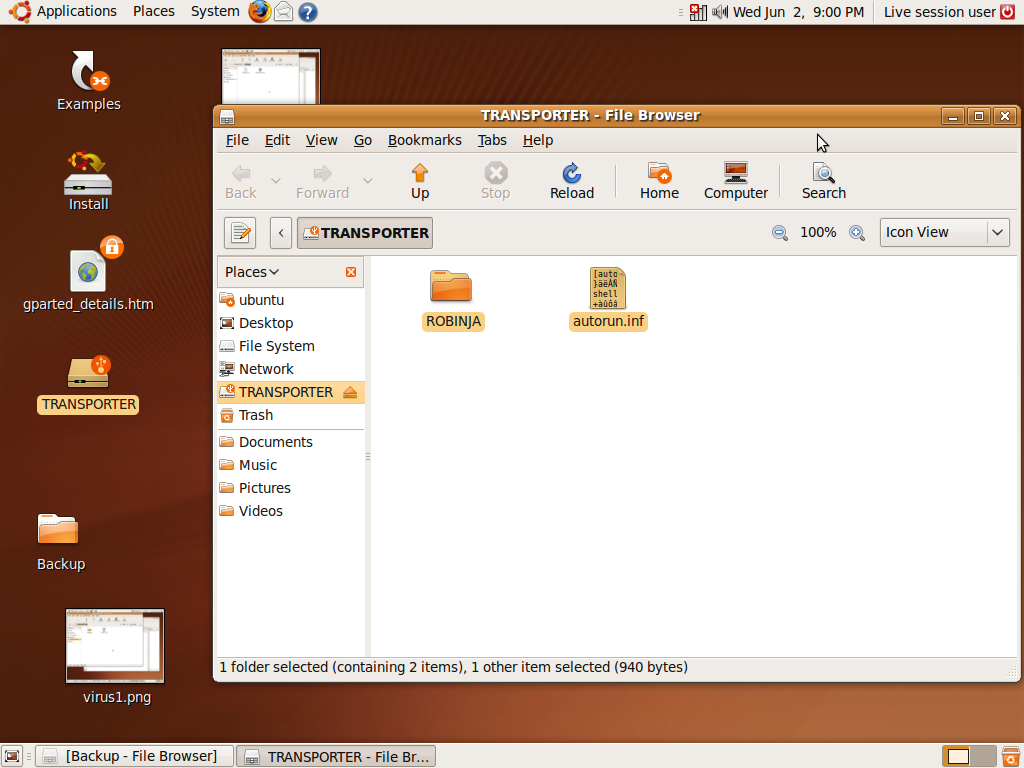
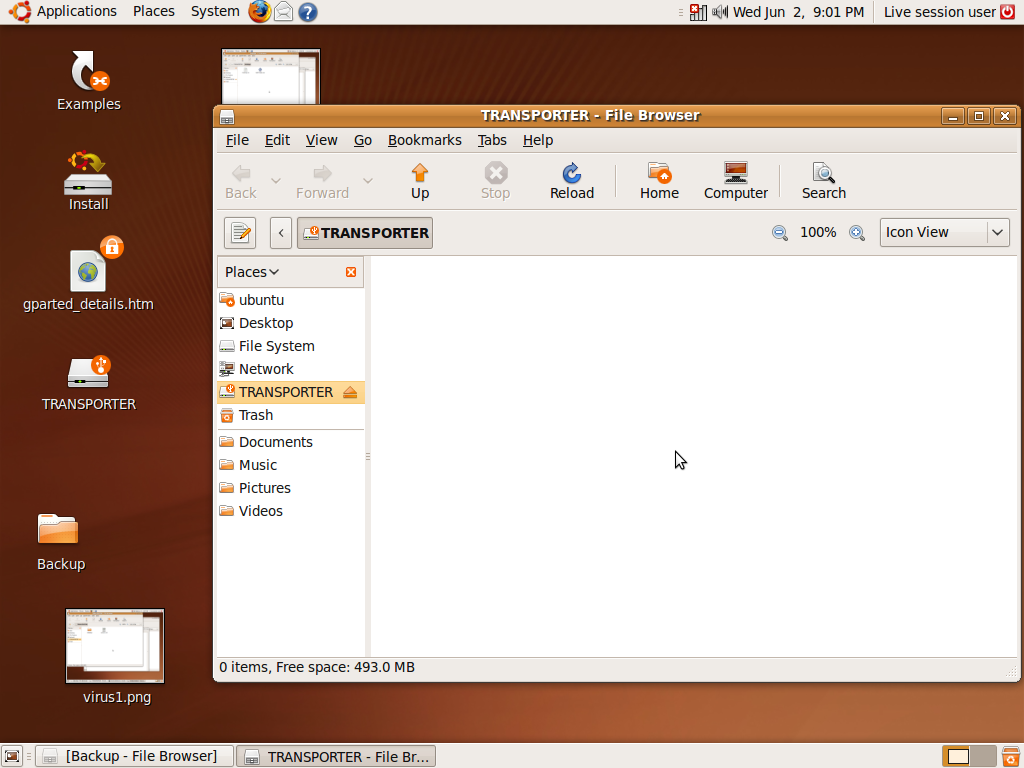
Fig. 4
Step 8:
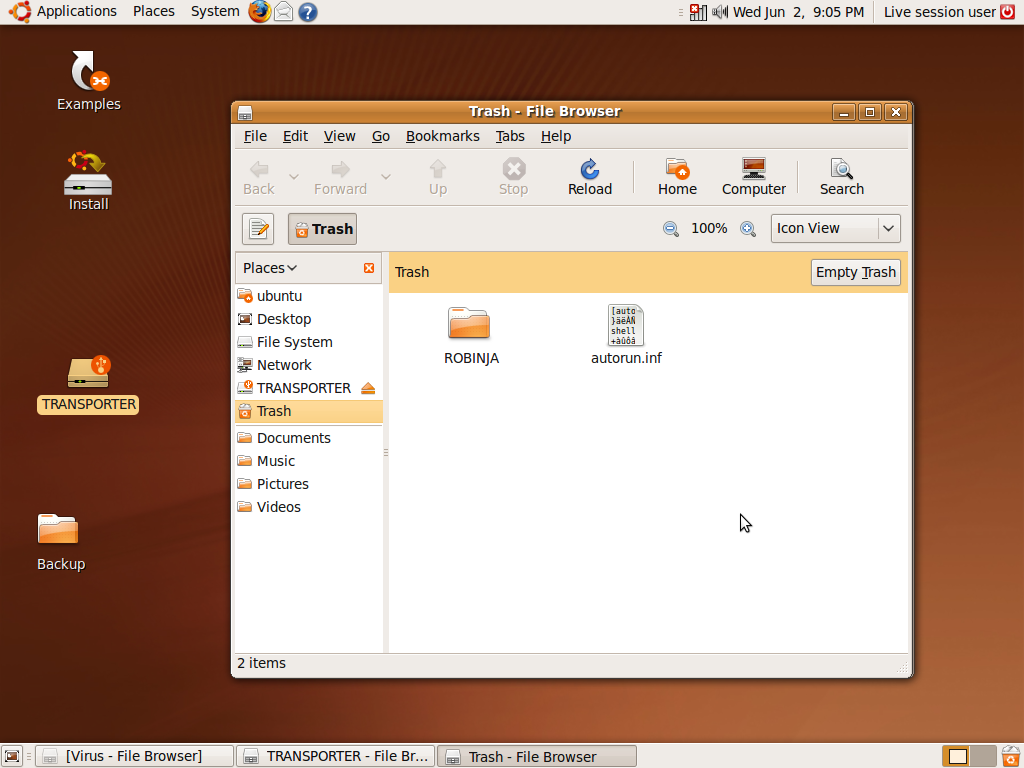
Open the Trash by clicking the recycle icon in the bottom right hand corner of your screen, Fig. 5. Notice that the folder is there.
Fig. 5
Step 9:
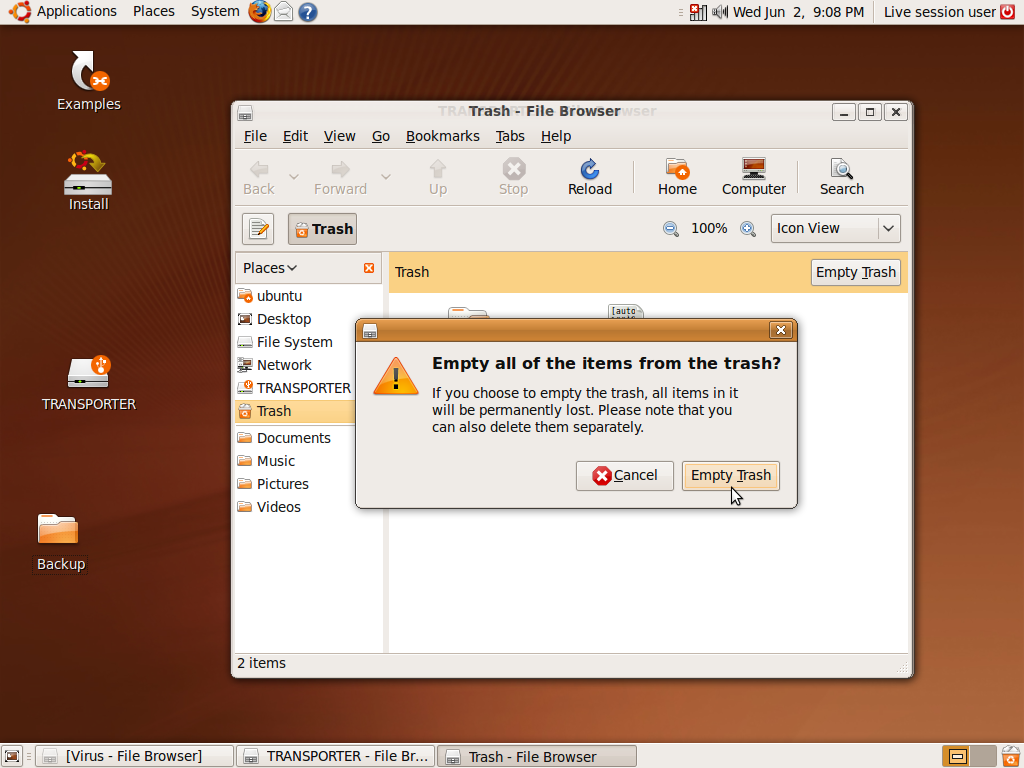
Click the 'Empty Trash' button, Fig. 6, and confirm this action, Fig. 7.
Fig. 6

Fig. 7
Step 10:
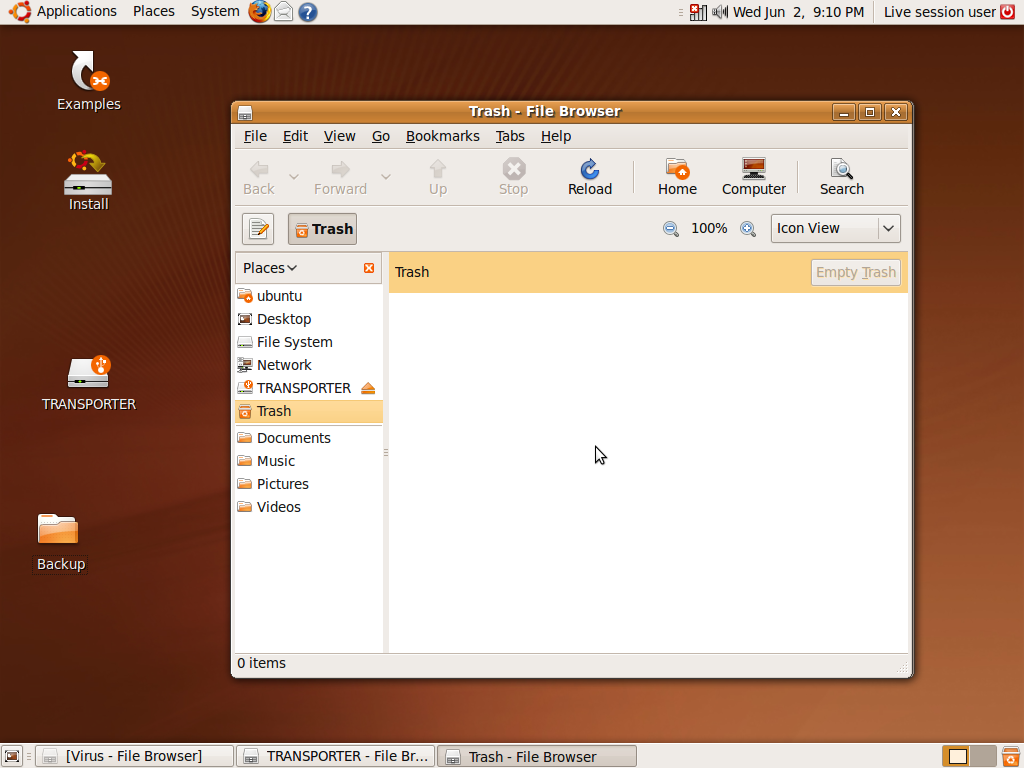
The contents of the Trash folder should be all gone (if all the steps were followed correctly), Fig. 8. Also notice that the Empty Trash button has now become inactive.
You can close all windows, eject your storage medium and reboot your PC/Laptop.
Fig. 8
No comments:
Post a Comment